Architecture
The diagram below describes how REST Enabled SQL works.
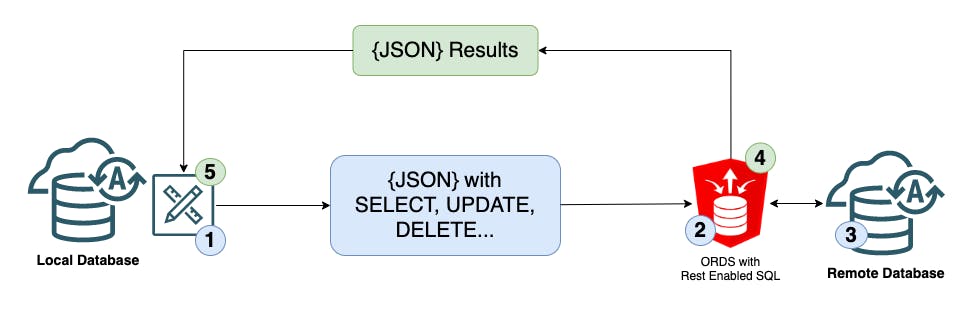
- The APEX App in the Local Instance builds a SQL statement, adds some session initialization code, and sends the request to the Remote Database
- ORDS in the Remote Instance receives the request, parses the JSON, assigns a JDBC connection, and passes the code to the database to run
- The remote database executes the code and gives the results back to ORDS
- ORDS generates a JSON response and sends it back to the Local Database
- APEX in the Local Database parses the JSON results and renders the appropriate data on the APEX page
Example Scenario
In this post, we will use the example of an item master table sitting
in the Remote Database. The requirement is to create an Interactive
Grid in the Local Database, which allows users to maintain items
directly in the Remote Database without the need to host the table in
the Local Instance. The table in the remote instance is called CNDEMO_ITEMS.
Remote Database Setups
This section describes how to set up an OAuth2 secured REST Enabled SQL Endpoint.
ORDS Server
If you maintain your own ORDS Server, you must include the following entry in the settings.xml file. REST Enabled SQL is enabled by default if you use Oracle Cloud Infrastructure (OCI) Autonomous Database or APEX Service.
<entry key="restEnabledSql.active">true</entry>
❗You must be running your ORDS server on HTTPS to use REST Enabled SQL.
Once this is in place, you can access REST Enabled SQL using a
special endpoint. The endpoint is the base URL for ORDS concatenated
with /_/sql. So, if you access APEX Builder using https://example.com/ords/, then the REST Enabled SQL endpoint would be https://example.com/ords/_/sql.
Create OAuth2 Client
We need an ORDS OAuth client to secure our REST Enabled SQL Endpoint. Run the following code in the Remote Database schema where your data is located. This will create an OAuth2 Client and assign it to the 'SQL Developer' role. This role allows us to run DDL and DML against the Schema using REST Enabled SQL.
DECLARE
  c_client_name         CONSTANT VARCHAR2(200) := 'REST_ENABLED_SQL_ACCESS';
  c_client_description  CONSTANT VARCHAR2(200) := 'Client for OAuth2 Secured REST Enabled SQL Access';
  c_support_email       CONSTANT VARCHAR2(200) := 'jon@example.com';
BEGIN

  -- REST Enable the Schema.
  ords.enable_schema;

  -- Create OAuth Client to protect the REST Enabled SQL Endpoint. --
  oauth.delete_client(p_name => c_client_name);
  oauth.create_client
   (p_name            => c_client_name,
    p_description     => c_client_description,
    p_grant_type      => 'client_credentials',
    p_support_email   => c_support_email,
    p_privilege_names => NULL);

  -- Grant Client 'SQL Developer' Role, Needed for REST Enabled SQL.
  oauth.grant_client_role(c_client_name, 'SQL Developer');
  commit;
END;
/
Immediately run the following SQL to get the Client ID and Client Secret.
SELECT name
,      client_id
,      client_secret
FROM   user_ords_clients
WHERE  name = 'REST_ENABLED_SQL_ACCESS'
✏️ Take note of the client_id and client_secret
Test Using Postman
We can now test the REST Enabled SQL endpoint using Postman.
Get an OAuth Token
Using the client_id and client_secret from above, we can fetch an OAuth token as follows:
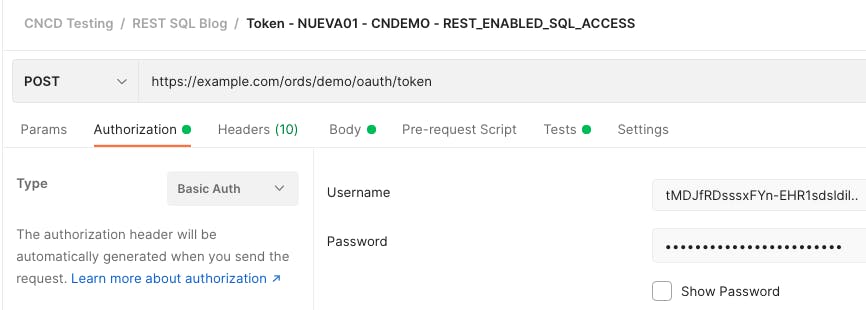
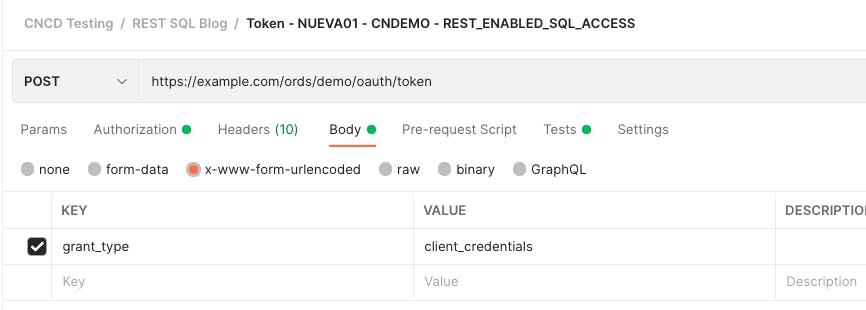
JSON Response:
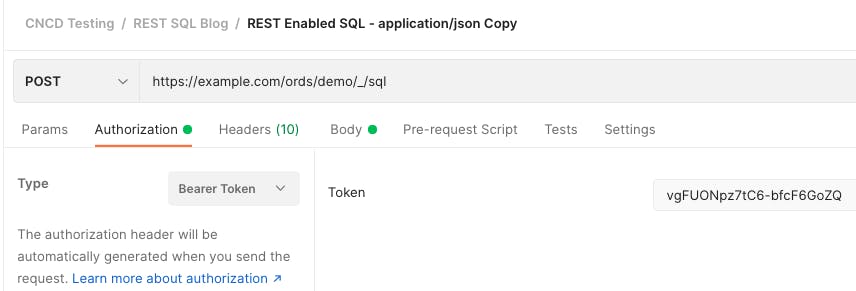
{"access_token":"vgFUONpz7tC6-bfcF6GoZQ",
 "token_type":"bearer",
 "expires_in":3600}
Test a Basic SQL Query
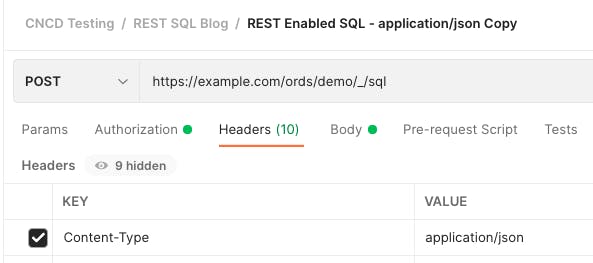
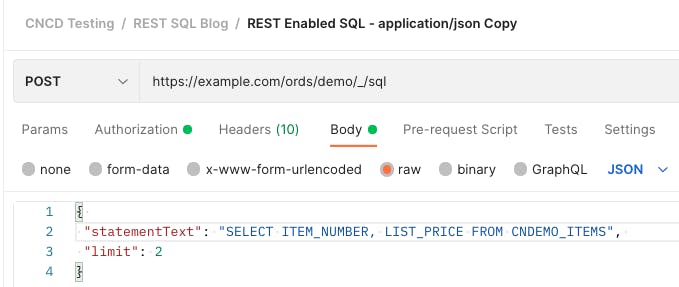
Using the token from the previous step, we can send the following SQL to the database:
JSON Response:
{
    "env": {
        "defaultTimeZone": "UTC"
    },
    "items": [
        {
            "statementId": 1,
            "statementType": "query",
            "statementPos": {
                "startLine": 1,
                "endLine": 2
            },
            "statementText": "SELECT ITEM_NUMBER, LIST_PRICE FROM CNDEMO_ITEMS",
            "resultSet": {
                "metadata": [
                    {
                        "columnName": "ITEM_NUMBER",
                        "jsonColumnName": "item_number",
                        "columnTypeName": "VARCHAR2",
                        "columnClassName": "java.lang.String",
                        "precision": 50,
                        "scale": 0,
                        "isNullable": 0
                    },
                    {
                        "columnName": "LIST_PRICE",
                        "jsonColumnName": "list_price",
                        "columnTypeName": "NUMBER",
                        "columnClassName": "java.math.BigDecimal",
                        "precision": 0,
                        "scale": -127,
                        "isNullable": 0
                    }
                ],
                "items": [
                    {
                        "item_number": "BILAA8LX08",
                        "list_price": 89.99
                    },
                    {
                        "item_number": "GSQH6YQ1YM",
                        "list_price": 999.99
                    }
                ],
                "hasMore": true,
                "limit": 2,
                "offset": 0,
                "count": 2
            },
            "response": [],
            "result": 0
        }
    ]
}
In the above example, we passed the Header Content-Type:application/json, meaning we need to pass a JSON document with the SQL in the statementText field. JSON allows us to send multiple statements in an array with each statement identified by the statementId field. Importantly, you get an array response back, and you can associate each statementId in the response with the corresponding statementId in the request. There are also fields you can pass to perform pagination etc.
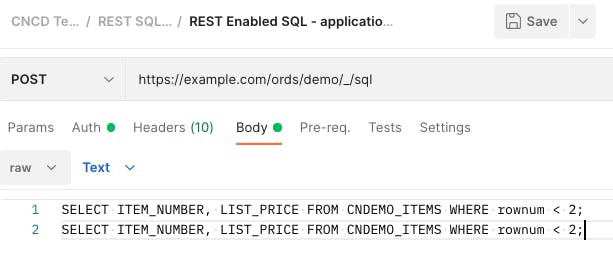
If you change the Header to Content-Type:application/sql, we can send plain SQL statements e.g.
📖 REST Enabled SQL has far too many options to cover in this post, so I encourage you to read through the documentation.
❗At this point, we have not mentioned APEX. REST Enabled SQL (as with regular ORDS REST services) can be used by any client that can consume REST web services.
Local Database Setups
This section describes the APEX setups that need to be made in the Local Database to link to and use the REST Enabled SQL Endpoint in the Remote Database.
Create Web Credentials
First, we must create Web Credentials for the OAuth2 Client we created in the Remote Instance. These Web Credentials allow APEX to request a token that will enable it to call REST Enabled SQL in the Remote Database.
Log in to APEX Builder in the Local Database
- 🧭 Workspace Utilities > Web Credentials > Click the
CreateButton - Enter a Name and Static Identifier
- Select 'Authentication Type' = 'OAuth2 Client Credentials'
- Client ID or Username =
client_idfrom above - Client Secret or Password and 'Verify Client Secret or Password' =
client_secretfrom above - Click the
Createbutton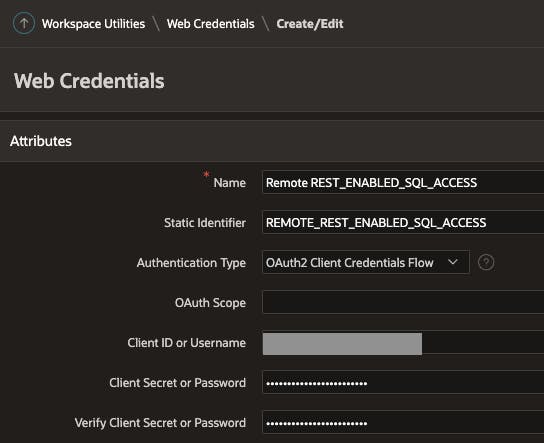
Create the REST Enabled SQL Service
Next, we must create an APEX REST Enabled SQL Service.
Log in to APEX Builder in the Local Database
- 🧭 Workspace Utilities > REST Enabled SQL Services > Click the
CreateButton - Enter a Name and the Endpoint URL for the Remote Database
- Note: The 'Endpoint URL' is the base URL for ORDS
in the Remote Instance. This is the same URL you use to access APEX
Builder in the Remote Instance, e.g.
https://example.com/ords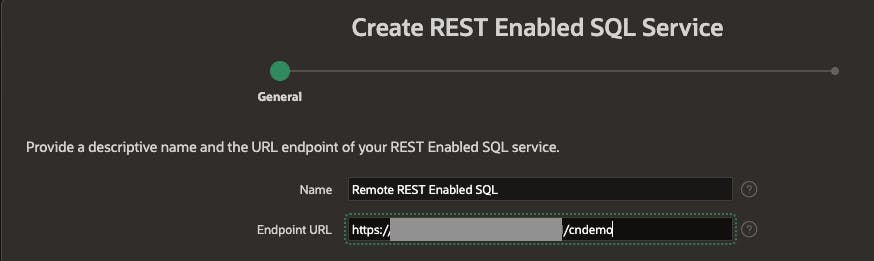
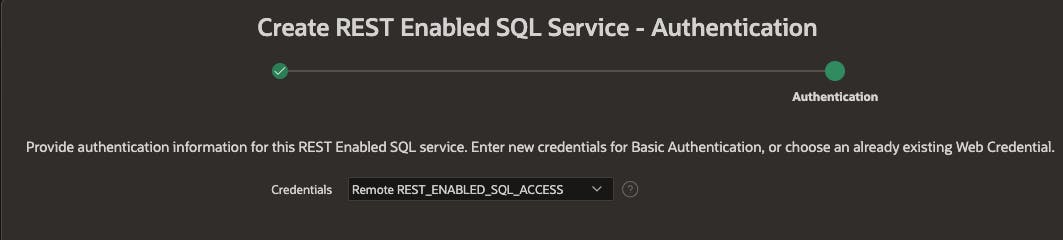
- Click Next, then select the Web Credential Created in the previous step
- Click the
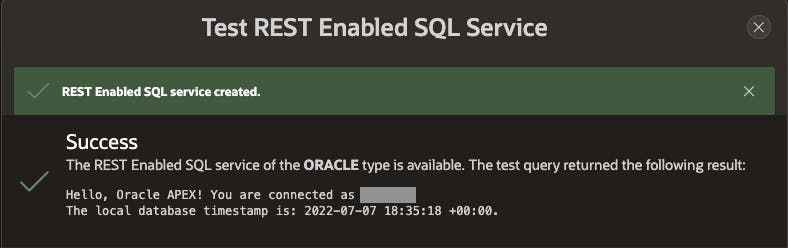
Createbutton - APEX will test its connection to the Remote Database; you will see the following message if everything is OK:
Create an APEX Interactive Grid
It is time to create an APEX page with an Interactive Grid to maintain the items in the Remote Instance.
- Create a new Blank Page in an App in the Local Instance
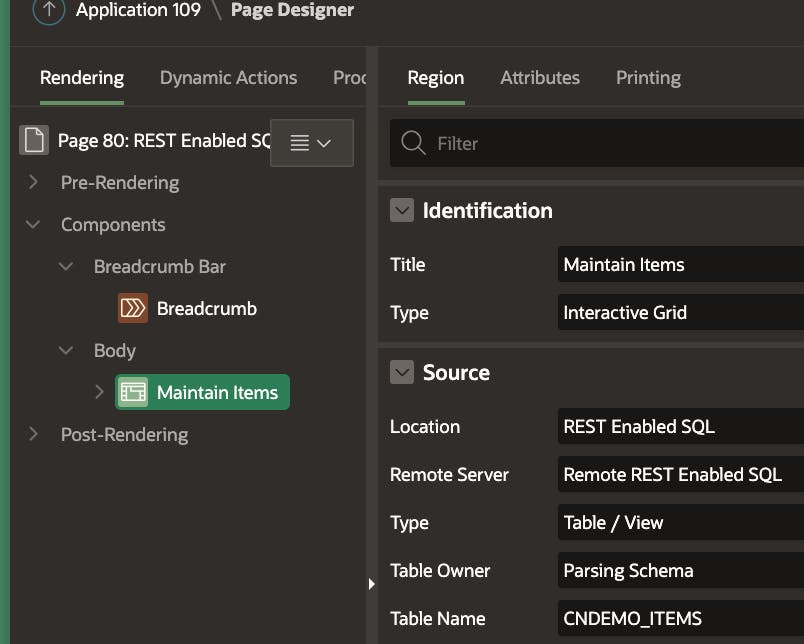
- Create a new Region and configure it as follows
- Identification > Type =
Interactive Grid - Source > Location =
REST Enabled SQL - Source > Remote Server =
Remote REST Enabled SQL(created above) - Source > Type =
Table / View - Source > Table Owner =
Parsing Schema - Source > Table Name = Click the List of Values Icon and select your table
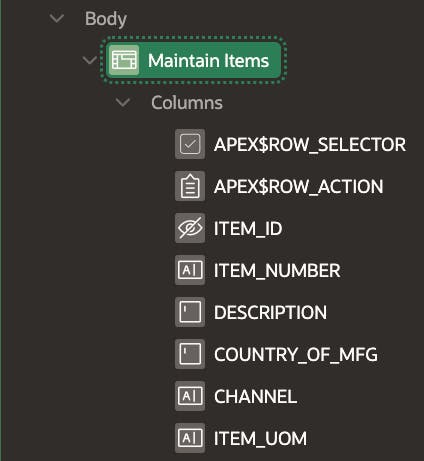
- ❗At this point, APEX is querying the data dictionary in the Remote
Instance using REST Enabled SQL. Once you select a table, APEX will
fetch the columns for the table and populate the Interactive Grid
Columns. Just like it does when you create an Interactive Grid on a
local table
- Identification > Type =
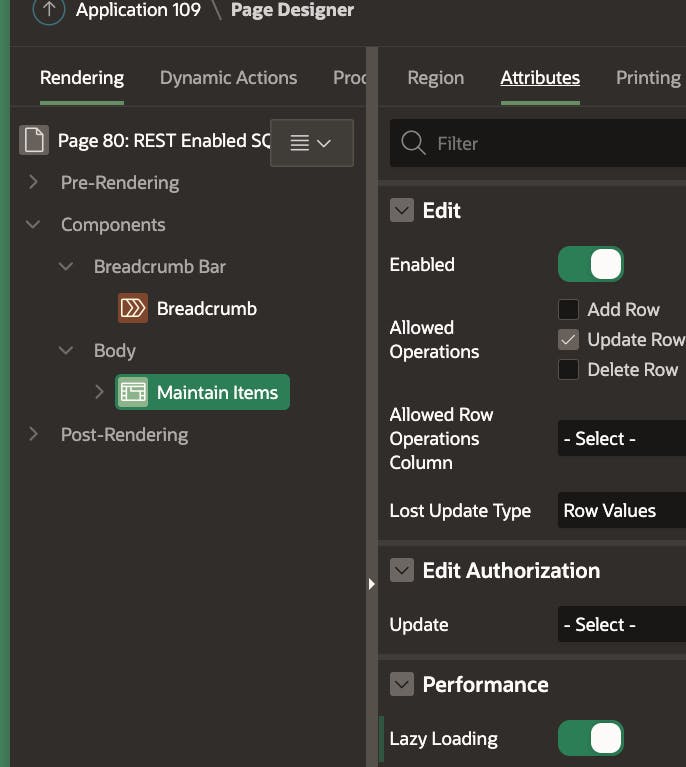
- Set the Interactive Grid Region Attributes as follows:
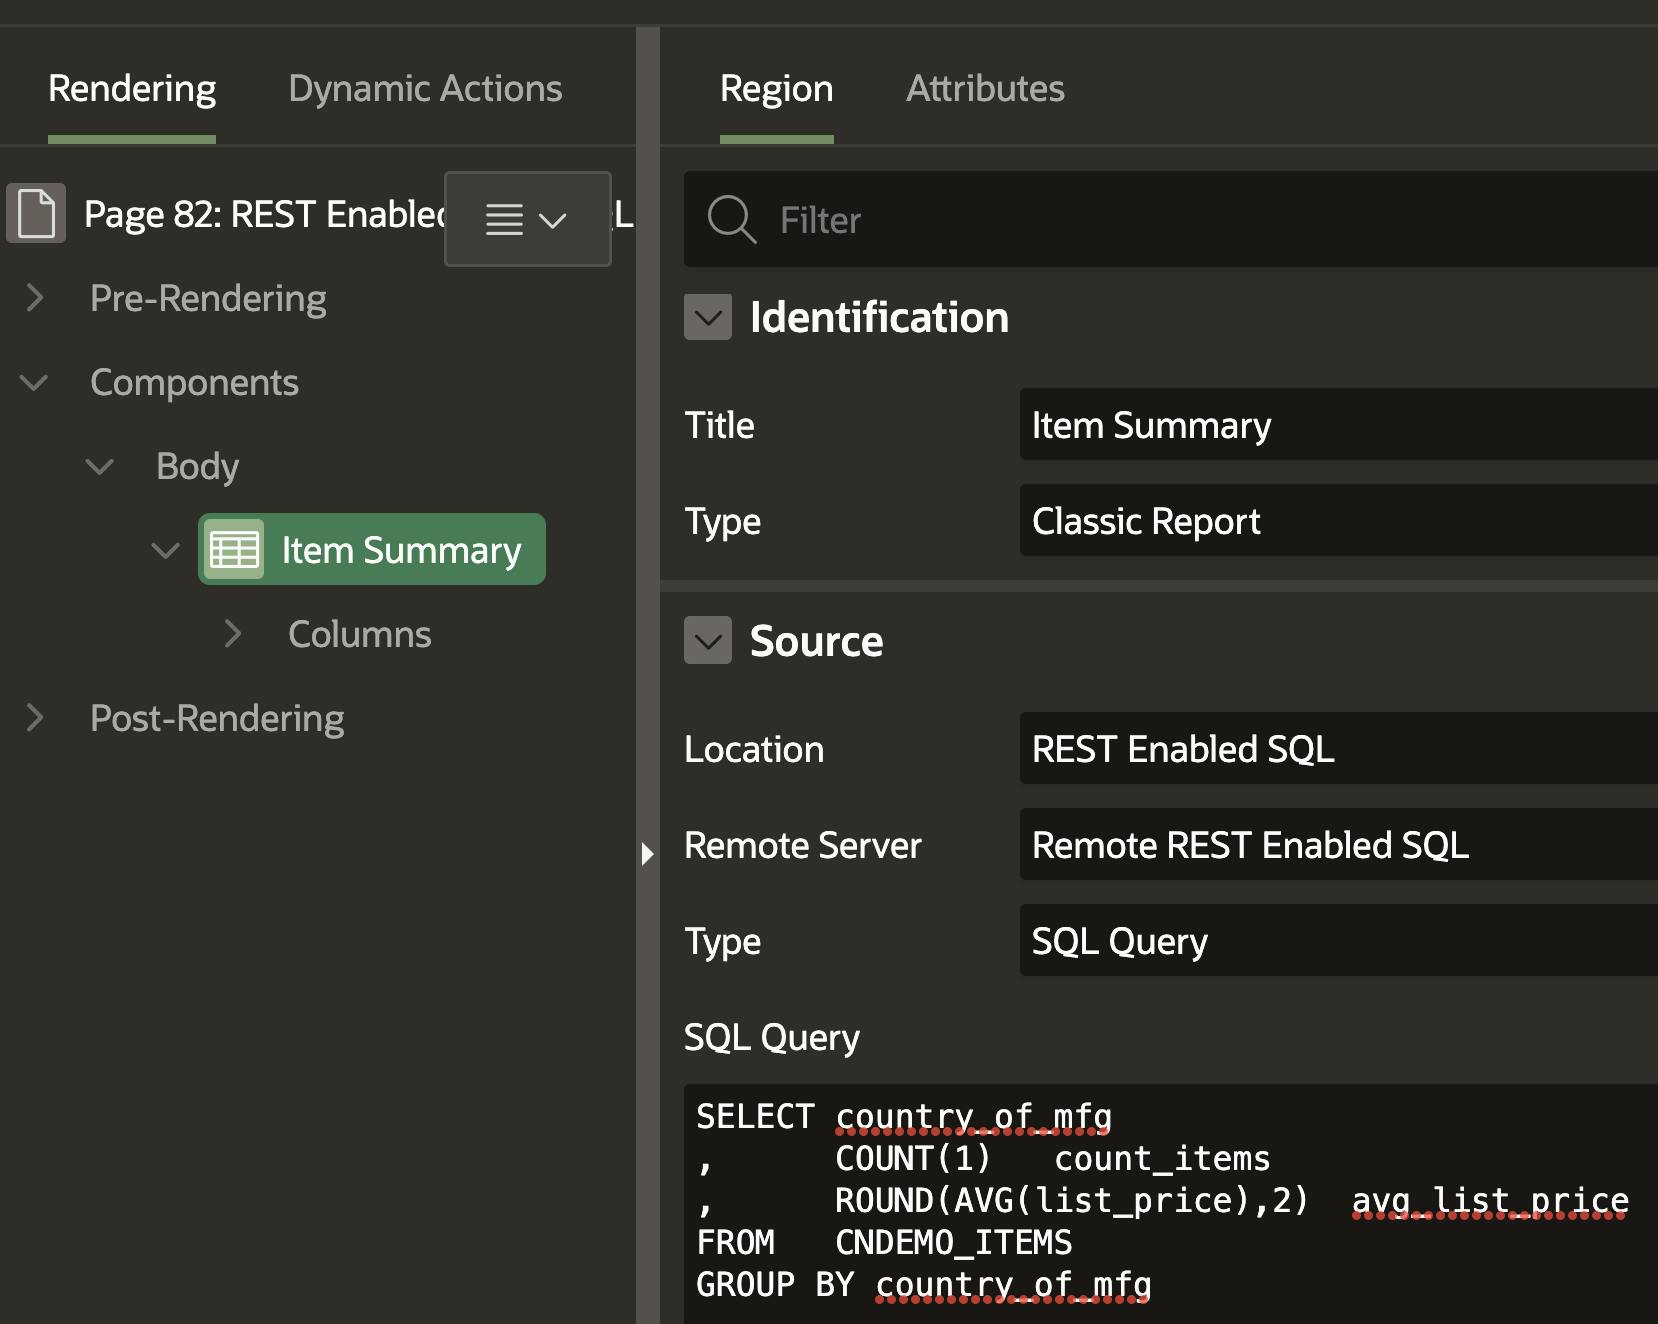
The above example is the simplest possible use case. Instead of
selecting a table in the Remote Database, we can enter a SQL statement.
The screenshot below shows a Classic Report with a SQL statement that
will run against the remote instance.
But don't stop there. You can use REST Enabled SQL Services for Chart Regions, Form Regions, List of Values, Interactive Reports, Cards Region, List View Regions, Map Regions, Calendar Regions, Reflow Report Region, Tree Region, plus some more I have probably missed.
Testing
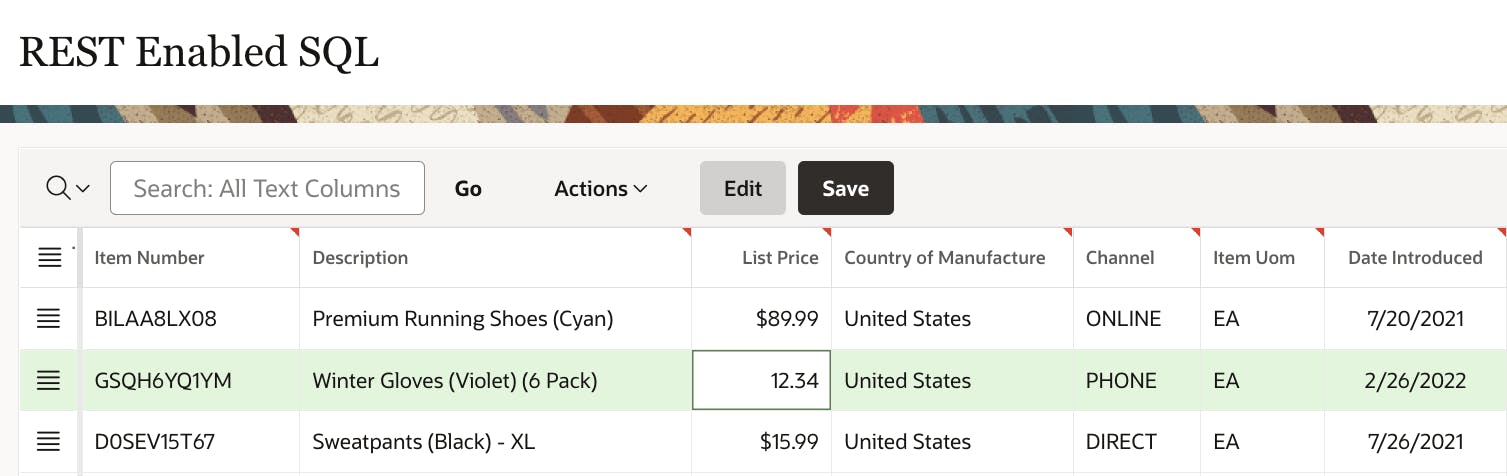
Run the page and verify you can make changes to the data and save.
The REST Enabled SQL interactive grid should behave as it would if it
were a local table.